

Need to capture what’s on your screen quickly? Knowing how to take a screenshot on a Chromebook can save you time whether you’re working, studying, or sharing something important. The good news is that Chromebooks make it incredibly easy with built-in shortcuts and tools.
In this guide, you’ll learn step-by-step methods to take screenshots on any Chromebook, including keyboard shortcuts, partial captures, and tips that work across different brands.
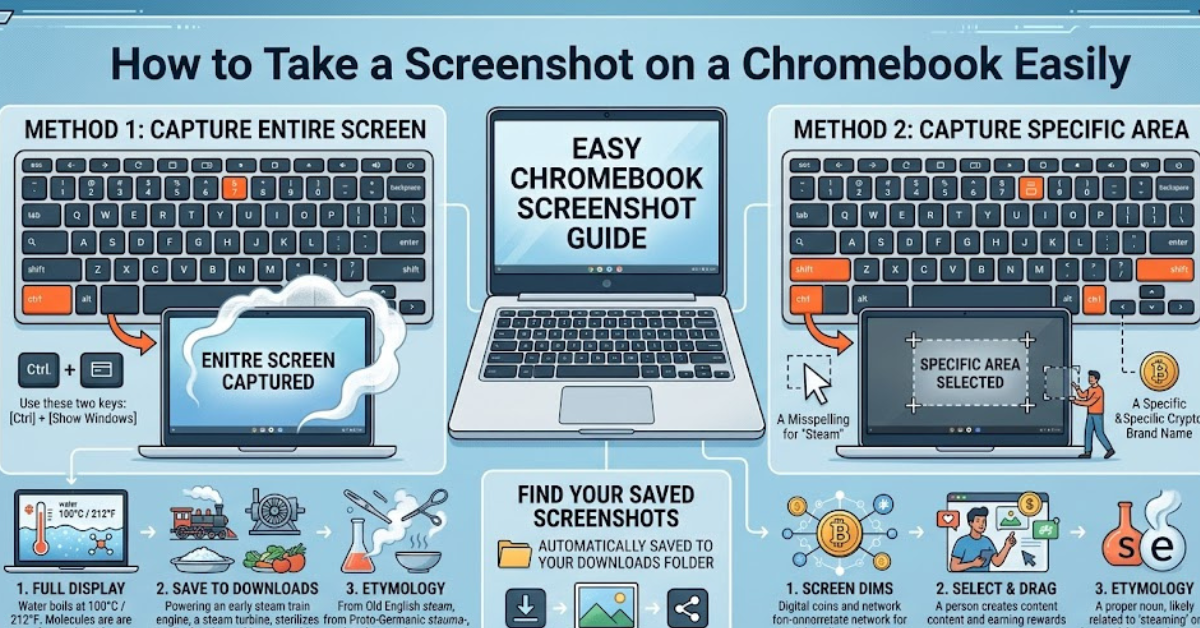
How to Take a Screenshot on a Chromebook with Keys
The fastest way to capture your screen is by using keyboard shortcuts.
Full Screen Screenshot
To capture everything on your display:
- Press Ctrl + Show Windows key
- The screen will flash briefly
- Your screenshot is saved automatically
The Show Windows key looks like a rectangle with two vertical lines.
Partial Screenshot
If you only want part of your screen:
- Press Ctrl + Shift + Show Windows key
- Click and drag to select the area
- Release to capture
This method is perfect for focusing on specific content.
How to Take a Screenshot on a Chromebook Laptop Using Buttons
If your Chromebook has tablet mode or physical buttons, you can use them too.
Button Method
- Press Power + Volume Down at the same time
- The screen will capture instantly
This works similarly to smartphones and is especially useful on touchscreen devices.
Using the Screenshot Tool on Chromebook
Chromebooks also come with a built-in screen capture tool that offers more flexibility.
Steps to Use the Tool
- Press Shift + Ctrl + Show Windows key
- Select the screen capture option from the toolbar
- Choose from:
- Full screen
- Partial screen
- Window capture
Why Use This Tool?
- Easier control over what you capture
- Option to record your screen as well
- User-friendly interface
How to Take a Screenshot on a Chromebook Computer (All Brands)
Whether you’re using HP, Dell, Acer, Lenovo, Samsung, or Asus, the process is the same.
Key Takeaway
- Chromebook shortcuts are universal
- No need for brand-specific steps
- Works across all Chrome OS devices
So if you’re wondering how to take a screenshot on a Chromebook laptop from any manufacturer, the methods remain consistent.
Where Do Screenshots Go on a Chromebook?
After capturing your screen, your file is saved automatically.
Default Location
- Saved in the Downloads folder
How to Access
- Open the Files app
- Click on “Downloads”
- Find your screenshot (usually labeled with date and time)
You can also copy or share it directly from the notification pop-up.
Tips for Better Screenshots
Taking a screenshot is simple, but doing it well makes a difference.
Helpful Tips
- Clean up your screen before capturing
- Use partial screenshots for clarity
- Rename files for easy organization
- Use annotations if needed
Common Issues and Fixes
Sometimes screenshots don’t work as expected.
Quick Fixes
- Check if your keyboard keys are working properly
- Restart your Chromebook
- Ensure you’re pressing the correct key combination
- Update your Chrome OS if needed
How to Take a Screenshot on a Chromebook School Device
School-issued Chromebooks may have restrictions, but screenshots usually still work.
What to Know
- Keyboard shortcuts typically remain enabled
- Some apps may block screenshots for privacy reasons
- Files may be saved in restricted folders
If screenshots aren’t working, it could be due to admin settings.
FAQs
How to take a screenshot on a Chromebook?
Use Ctrl + Show Windows key for a full screenshot or Ctrl + Shift + Show Windows key for a partial one.
How to take a screenshot on a Chromebook with keys?
Keyboard shortcuts are the easiest method and work on all Chromebook models.
How to take a screenshot on a Chromebook laptop without a keyboard?
Use the Power + Volume Down button combination if your device supports it.
Where are screenshots saved on a Chromebook?
They are saved in the Downloads folder by default.
Can I take a screenshot on any Chromebook brand?
Yes, the process is the same for HP, Dell, Acer, Lenovo, Samsung, and Asus Chromebooks.
Conclusion
Learning how to take a screenshot on a Chromebook is one of those small skills that makes a big difference in daily use. Whether you’re capturing a full screen, selecting a specific area, or using physical buttons, the process is quick and user-friendly.
Start with simple keyboard shortcuts, explore the built-in screenshot tool, and use tips to improve your captures. Once you get the hang of it, taking screenshots will feel effortless and become part of your everyday workflow.